Hold Fast!
giovedì 31 dicembre 2015
venerdì 11 dicembre 2015
163 - Farewell! Goodbye!
Sold yesterday after 14 years, 380.000 kilometers on the clock and many many adventures. Farewell mate!
venerdì 4 dicembre 2015
venerdì 27 novembre 2015
venerdì 20 novembre 2015
160 - It Starts To Look Like Car
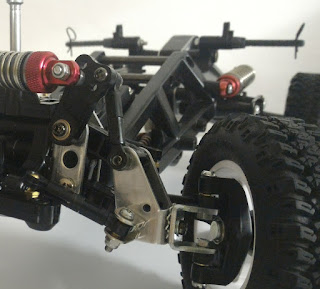
After the cleaning of the axles, this week, I've targeted the suspensiond. Switched back to original dampers I've chosen a mixed setup: full drop without springs for the front dampers and internal springs for the rear ones. This setup limits torque twist and allowes better angles for the rear shaft.
venerdì 13 novembre 2015
159 - Homework Done!
venerdì 6 novembre 2015
158 - Chassis & Radio Tray
sabato 31 ottobre 2015
venerdì 23 ottobre 2015
156 - Tonkatsu 2.0 Project Has Started
At this point I've decided to consider my Brat as finished... well, it's not finished but it's, more or less, like when a maul doesn't go forward on the rugby field. So it's time to start my next project: clean, refurb and modify my CR01, again. It needs a new and definitive electronic tray design, maybe some chassis upgrades and a new body.
mercoledì 21 ottobre 2015
venerdì 16 ottobre 2015
154 - Minor Works
This week only minor works have been done.
Better set-up for cables:
venerdì 9 ottobre 2015
153 - Electronic Set-up For The Brat
Pretty tired to paint the body and to correct my errors, with the electronics I've ordered and received, I've completed the car. I've choose a re-branded HK ESC and a low end Savox digital servo because I've considered that for this car is enough.
I've noticed that minor adjustments are needed to fit lipos and, as usual, the first layout for the cables disappoint me: I will solve it ASAP.
venerdì 2 ottobre 2015
152 - Body Finishing & Rescuing
sabato 26 settembre 2015
venerdì 18 settembre 2015
venerdì 11 settembre 2015
149 - Bodywork Started
Received a Brat body, not the Brat body I've ordered but a disappointing Mud Blaster II body, and Ive started to work on it. First steps with masking tape nd black marker, I've made two extra holes for the custom made body mounts.
sabato 5 settembre 2015
148 - Front End... Again!
venerdì 28 agosto 2015
147 - DB01 Uprights & Front Hexes, Definitive Version
sabato 22 agosto 2015
146 - Push Rod & Monoshock
This week (monday in the morning to be precise) I've had the fatal inspiration. In the afternoon I've rescued part of my Cr01's suspensions cantilevers, I've modified it and used it to build what I had in mind from the morning. During the week I've made some adjustments: correct rods, correct damper and correct spring. Now it's the time to finish the rest of the car.


